How to Colorize Old Photos with AI: A Complete Guide
Learn how to colorize black and white family photos using AI — from scanning vintage prints to downloading natural, lifelike color results with Pixomax Studio.
 (opens in new tab)
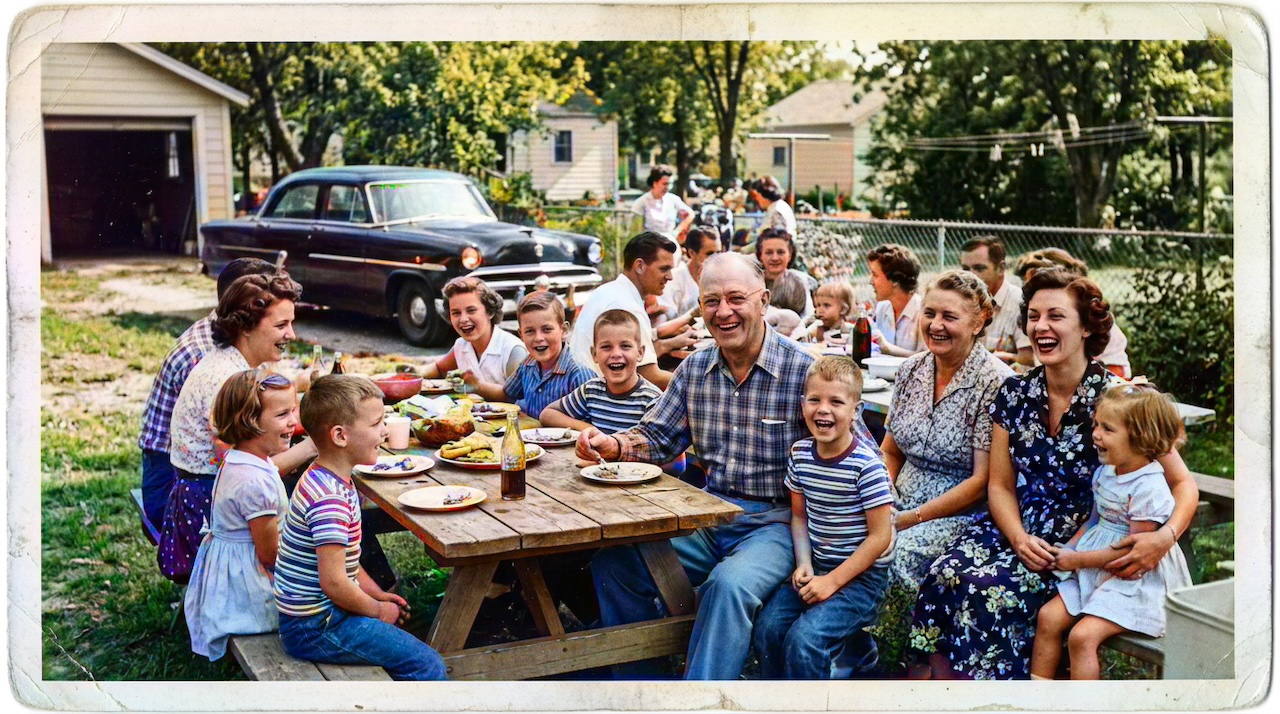 (opens in new tab)
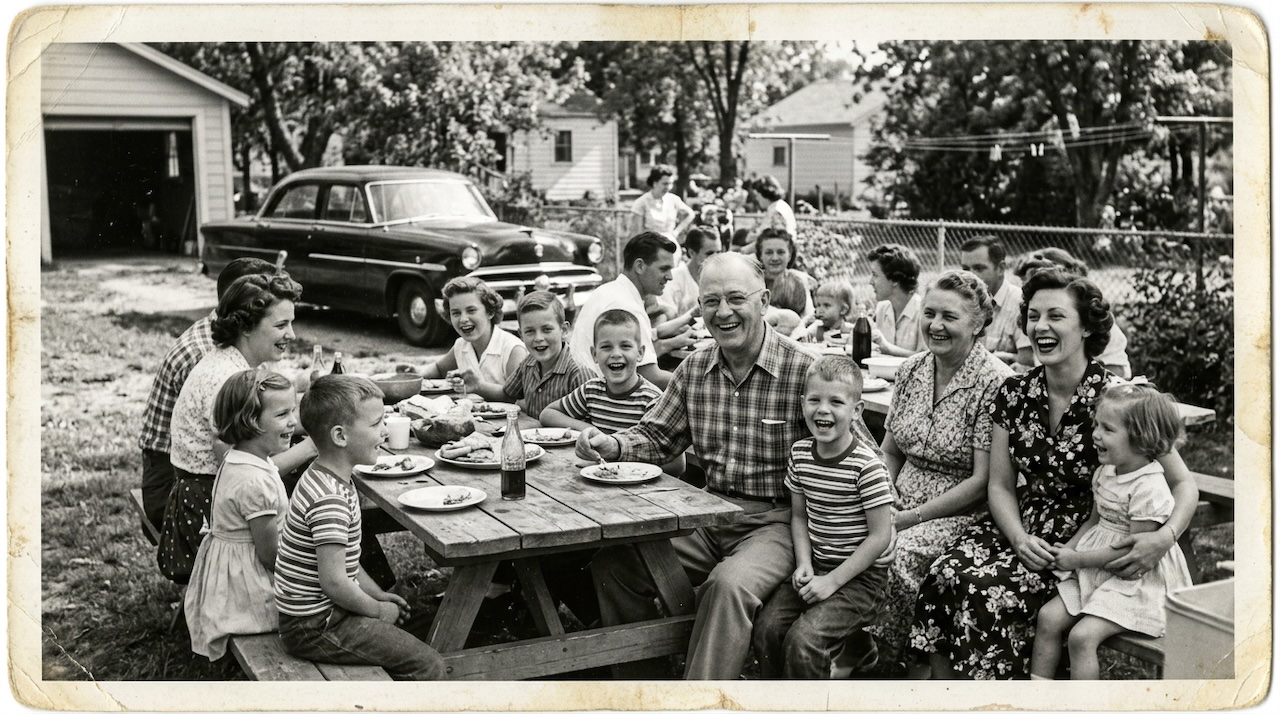
Pixomax Studio result — 1950s family picnic. How to Colorize Old Photos with AI: A Complete Guide.
Click any image to open full size in a new tab.
Black and white photographs hold decades of family history — weddings, military service, childhood summers — but color can make those memories feel immediate again. Modern AI colorization analyzes tone, texture, and context to add believable color without the flat, painted look of older tools.
This guide walks you through the full workflow, from preparing a scan to downloading a print-ready colorized image. Try Pixomax's professional-grade AI colorizer to start with a free colorization on your first portrait.
Why AI colorization works for family archives
Traditional hand-coloring takes hours per image and requires specialist skills. AI models trained on millions of photographs — including Stable Diffusion img2img pipelines and DeOldify GAN architectures — understand how skin, fabrics, skies, and foliage typically appear, then apply that knowledge to your specific scan.
The best results come from photos that are:
- In focus — slight blur is fine, but heavy motion blur limits detail
- Well-lit — even exposure helps the model read shadows correctly
- High resolution — 600 DPI scans give the AI more texture to work with
AI colorization architectures compared
| Architecture | Example | Portrait quality | Self-host option |
|---|---|---|---|
| Latent diffusion (LDM) | Stable Diffusion img2img | Excellent | Yes — via Replicate or local GPU |
| GAN | DeOldify | Good | Yes — open source on GitHub |
| Hybrid commercial | Pixomax Studio Large model | Excellent | No — managed API + web app |
| Legacy autoencoder | Early ImageColorizer backends | Variable | No |
For a full tool-by-tool breakdown, see our guide to compare Pixomax vs ImageColorizer and other AI colorizers. To understand the terminology, visit the neural colorization glossary entry.
Step 1: Prepare your scan
Start with the best source you have. If you only have a physical print:
- Clean the glass on your scanner
- Scan at 600 DPI in color mode (even for B&W prints)
- Save as PNG or high-quality JPG
If you are photographing an album page, shoot straight-on in diffused daylight and avoid flash glare on glossy prints.
Tip: Do not pre-sharpen or auto-enhance before colorization. The AI pipeline handles contrast and noise better when it sees the raw scan.
Step 2: Upload and choose a model
Try Pixomax's professional-grade AI colorizer and drop your image onto the workbench. You can also paste from the clipboard or load from a public URL.
| Model | Inference speed | Best for | Skin tone accuracy |
|---|---|---|---|
| Large | Standard | Final exports — portraits, weddings, archives | Highest |
| Tiny | Fast | Quick previews before committing credits | Good |
For heirloom portraits and wedding photos, always use Large for the final download. See View Pixomax Studio pricing and credit plans for credit and subscription options.
Step 3: Inspect the result
Before downloading, use the before/after slider to check the same way we evaluated the picnic photo above:
- Skin tones — natural warmth, not orange or gray
- Clothing — period-appropriate hues (1950s pastels vs. 1940s wartime neutrals)
- Background — skies, foliage, and wallpaper should feel cohesive
AI colorization is interpretive — it reconstructs likely colors, not guaranteed historical accuracy. For genealogy projects, treat results as a vivid visualization rather than a forensic record.
Step 4: Download and preserve
Export the full-resolution PNG and store it alongside your original scan. A simple folder structure works well:
Family-Photos/
├── Originals/
│   └── grandma-1952-bw.png
└── Colorized/
    └── grandma-1952-color.png
Batch processing for large albums
If you are digitizing an entire shoebox of memories, Pixomax Studio batch processing for historical archives — queue dozens of scans, run the same pipeline, and download a ZIP when finished. For archive-scale workflows, read our guide on how to colorize black and white historical archives.
Frequently asked questions
Will AI colorization damage my original file?
No. The original scan is never modified. Colorization produces a new file alongside your archive copy.
Can I colorize damaged or faded photos?
Yes, but restoration (removing scratches, fixing tears) should happen first. Colorization works best on clean, well-exposed scans.
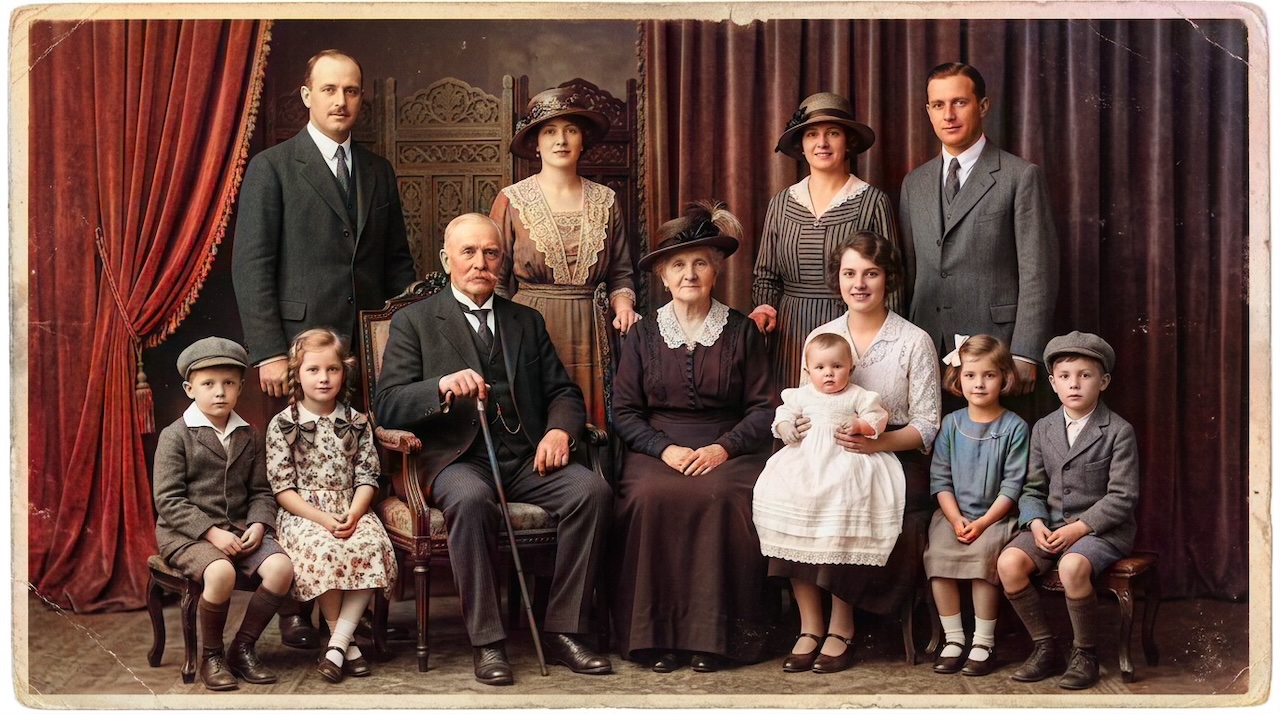
Is AI colorization historically accurate?
It is an educated reconstruction. For museum archives, pair AI colorization with documented research. For family albums, it is a powerful way to connect younger generations with their heritage.
Related guides
 Best AI Photo Colorizer in 2026: Top Tools Ranked for Quality & Value
Compare the best AI photo colorizers in 2026 — Pixomax Studio, ImageColorizer, DeOldify, Palette.fm, and MyHeritage — ranked by skin tone accuracy, batch processing, and export quality.
 How to Restore Family Photos for Free: A Step-by-Step Guide
Learn how to restore family photos for free — scan vintage prints, fix common damage, and colorize black and white memories using free AI tools like Pixomax Studio.
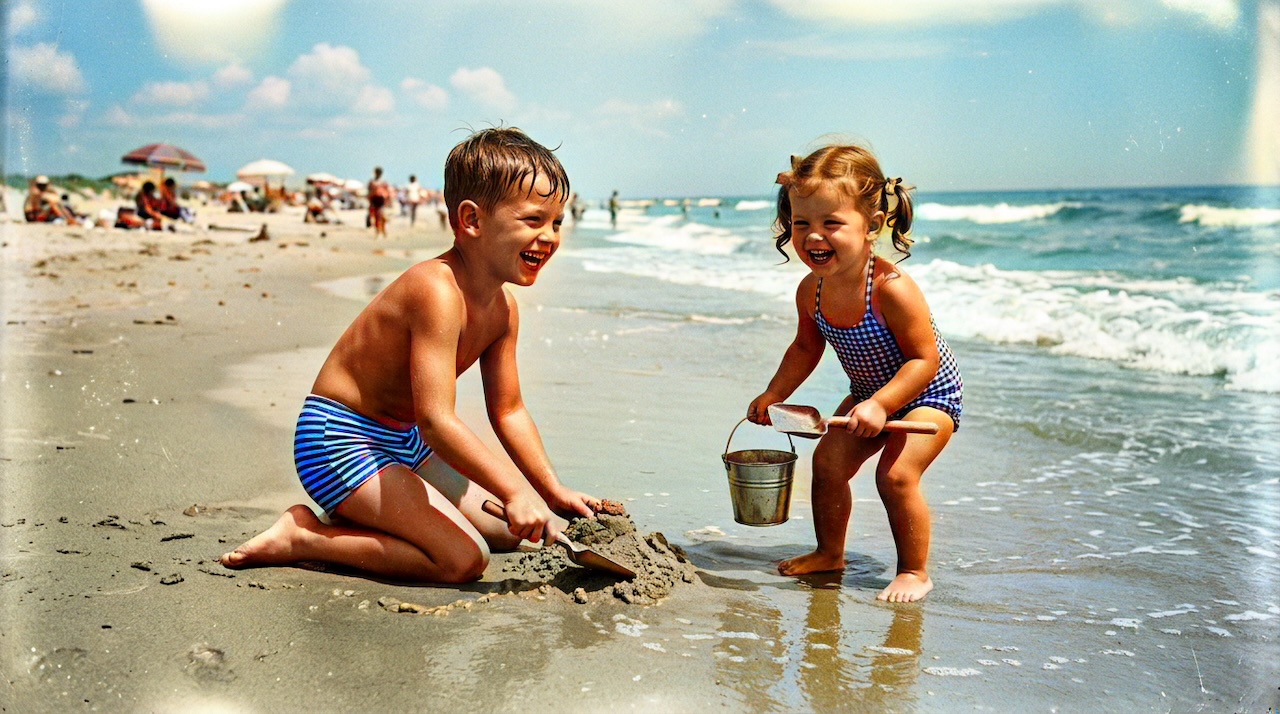
- Vintage Summer Photo Colorization: Bring Mid-Century Memories to Color
Colorize vintage summer photos from the 1940s–1960s — picnics, beaches, and backyard gatherings — with AI tuned for natural skin tones and outdoor lighting.
Compare tools in our AI photo colorizer comparison table or browse the colorization glossary.