Restore Damaged Vintage Photo Prints Before AI Colorization
Fix cracks, creases, and fading on damaged vintage prints before AI colorization — manual inpainting or Pixomax Smart Damage Repair (+1 credit) plus optional AI Clarity Boost (+2 credits) for 4K output.
 (opens in new tab)
 (opens in new tab)
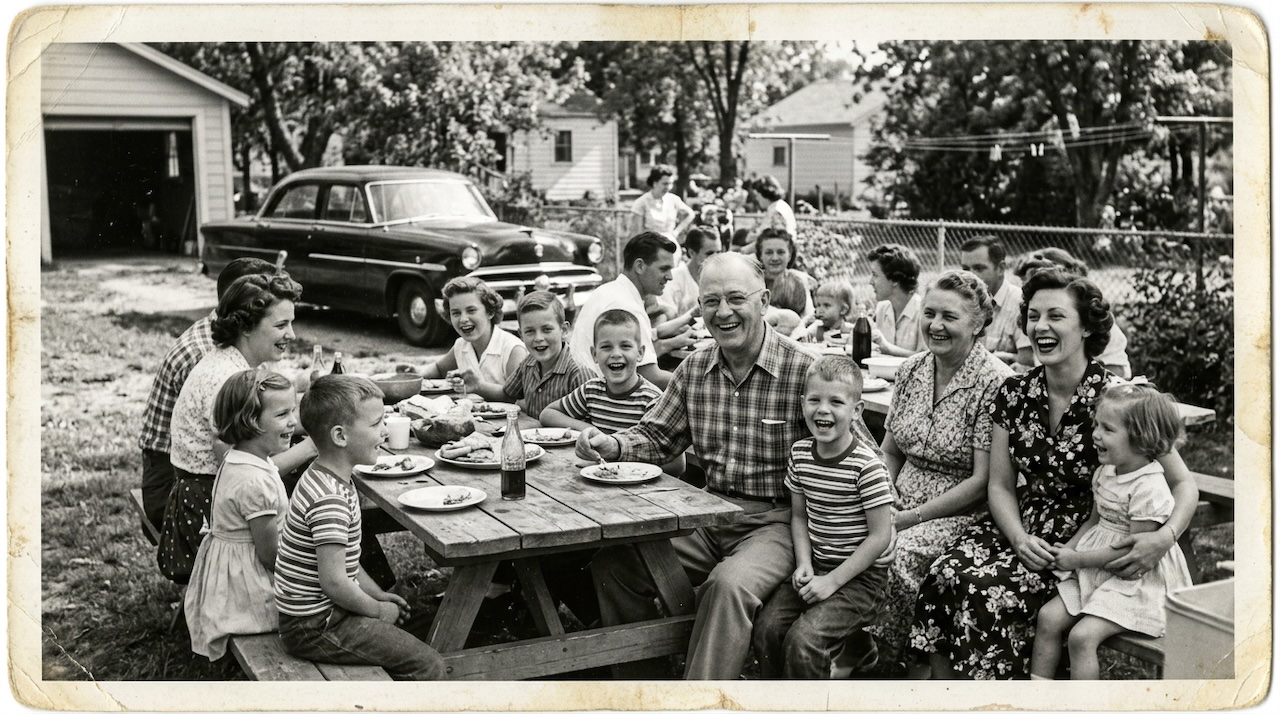
Pixomax Studio result — 1950s family picnic. Restore Damaged Vintage Photo Prints Before AI Colorization.
Click any image to open full size in a new tab.
Cracked emulsion, center creases, and foxing spots destroy both the aesthetic and colorization quality of vintage prints. Restoring damaged vintage photos before — or during — AI colorization separates amateur results from archive-grade output.
Learn photo restoration terminology before starting your project.
Colorize only vs repair + 4K boost
(opens in new tab)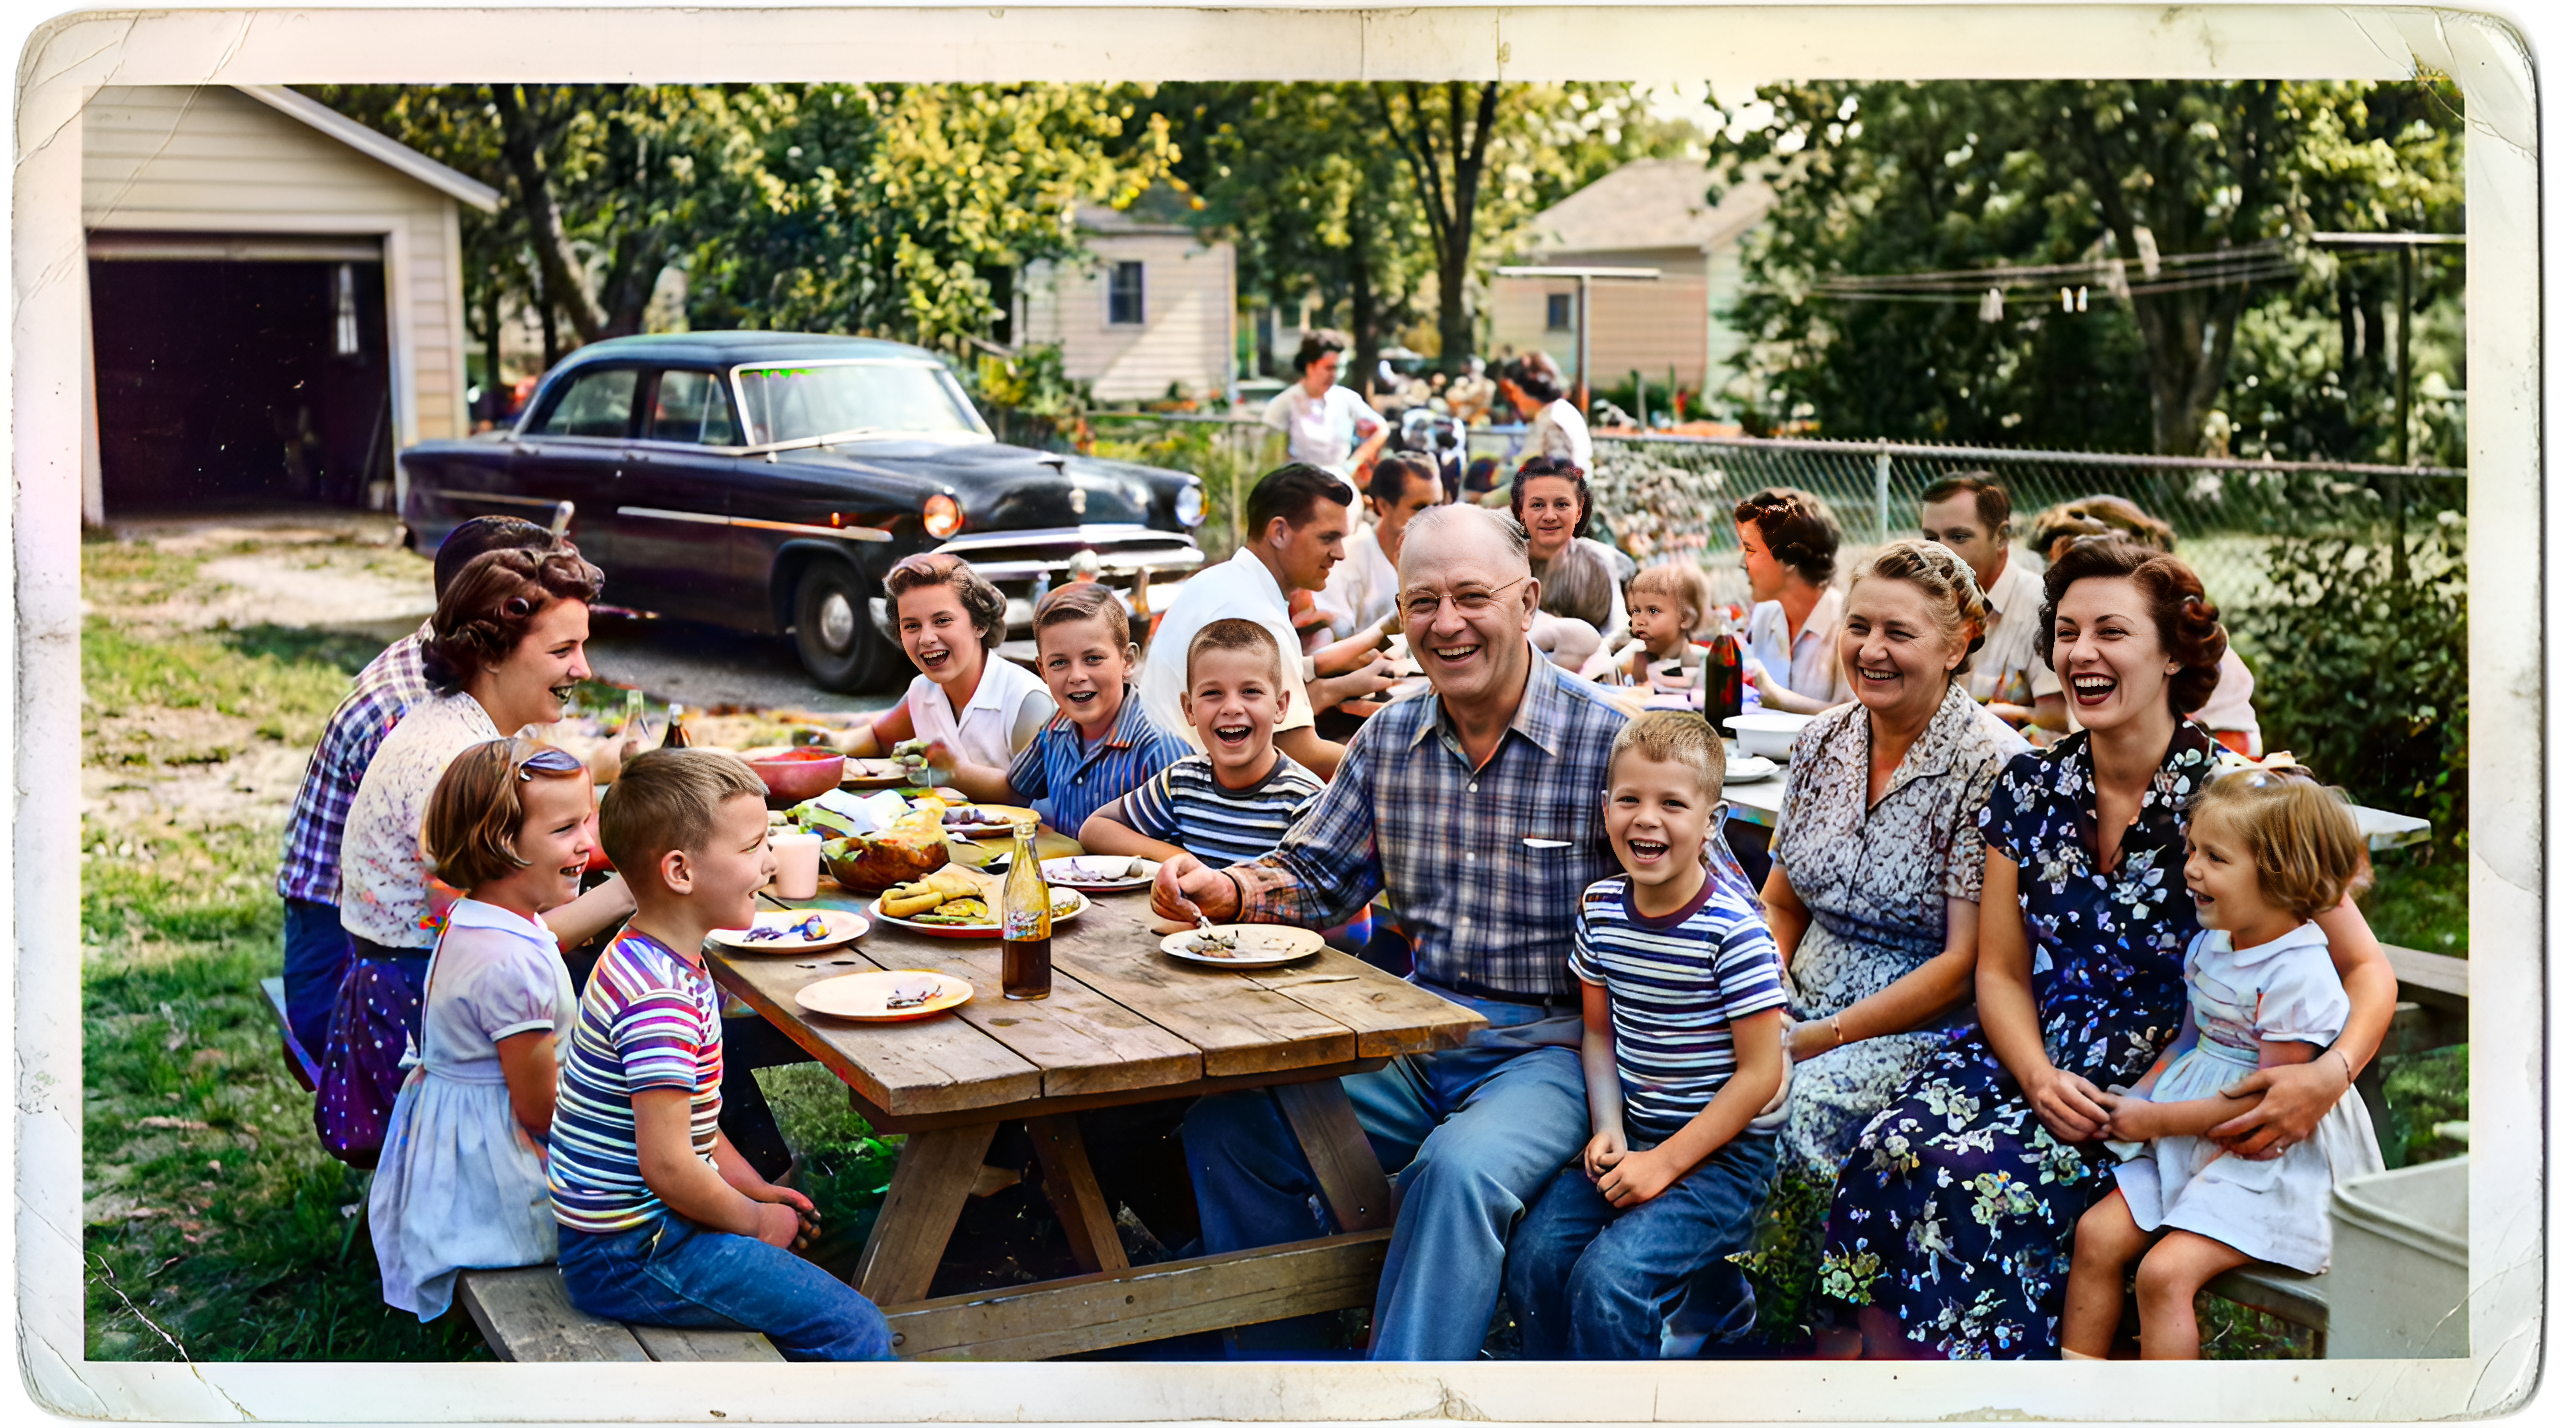 (opens in new tab)
Top: colorize only. Bottom: colorize + Smart Damage Repair + AI Clarity Boost to 4K — scratches fade, faces sharpen, and export resolution increases.
Click any image to open full size in a new tab.
The comparison above uses the same 1950s family picnic scan: standard colorization on top; Smart Damage Repair and AI Clarity Boost applied on the bottom. Scratches and wear fade, faces sharpen, and export resolution scales toward 4K.
Common damage types and fixes
| Damage | Pre-colorization fix | In Pixomax Studio |
|---|---|---|
| Center crease | Inpaint if through subject | Smart Damage Repair (+1 credit) |
| Light scratches | Optional manual heal | Smart Damage Repair (+1 credit) |
| Edge tears | Crop or reconstruct border | Manual first, then colorize |
| Sepia fading | Levels / curves adjustment | Upload corrected PNG |
| Soft facial detail | Higher DPI scan | AI Clarity Boost (+2 credits) |
Restoration then colorization pipeline
- High-resolution scan (never photograph a cracked print if scanning is available)
- Inpaint severe structural damage crossing subjects or horizons
- Export lossless PNG
- Try Pixomax's professional-grade AI colorizer with the Large model
- Enable Smart Damage Repair (+1 credit) for moderate scratches and creases
- Enable AI Clarity Boost (+2 credits) for heirloom prints and 4K wall output
- Compare before/after — verify cracks did not become color seams
For free manual restoration basics, see how to restore family photos for free.
Frequently asked questions
Should I colorize before or after repairing cracks?
Inpaint severe cracks through faces first. Light wear can use Smart Damage Repair for scratches and creases on vintage prints (+1 credit) during upload.
Can AI both restore damage and colorize?
Yes — Smart Damage Repair runs alongside the Large model. Heavy tears still need GIMP or Photopea first.
What is Smart Damage Repair on Pixomax Studio?
Optional +1 credit add-on that softens scratches and creases while colorizing — see the comparison above.
What DPI should I scan damaged vintage prints?
600 DPI minimum; 800 DPI for fine crack networks. Add AI Clarity Boost for sharper portraits and 4K upscale (+2 credits) for print-ready 4K exports.
Related guides
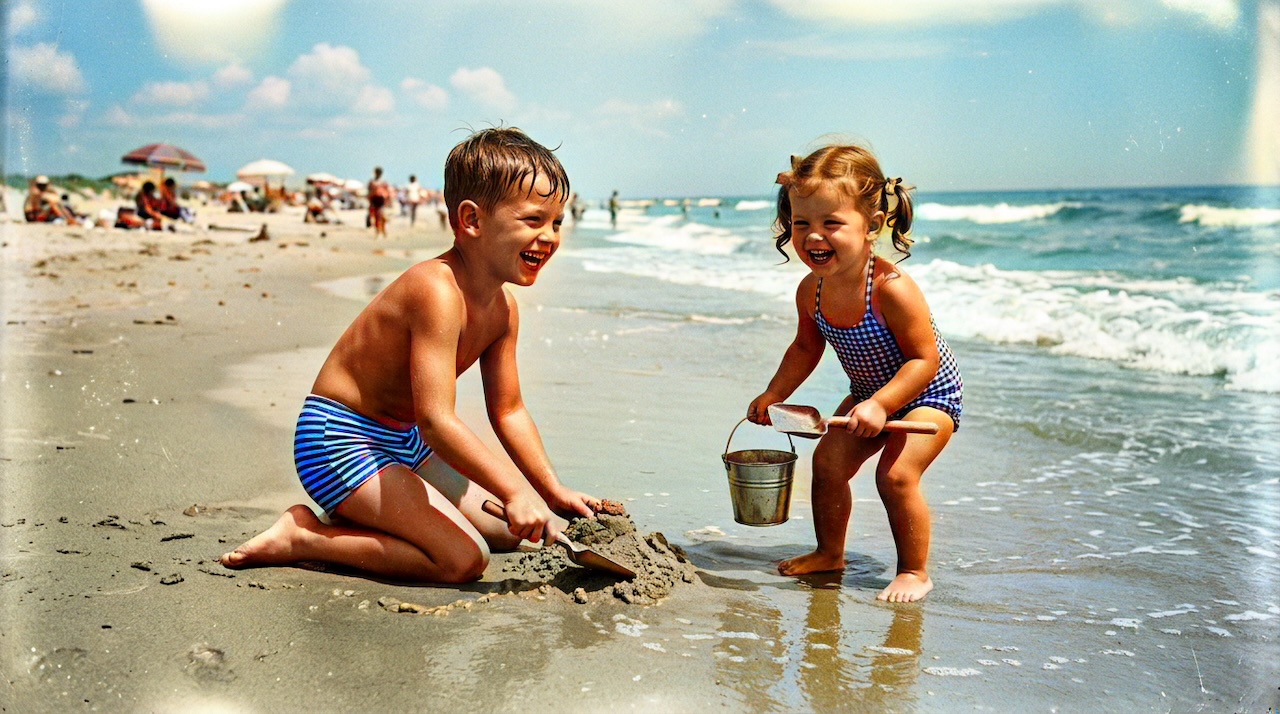 Colorize 1950s Beach Photos with AI: Childhood Summer Memories
Bring 1950s beach and childhood summer photos back to life with AI colorization — natural skin tones, ocean blues, and period swimwear colors.
- Best AI Photo Colorizer in 2026: Top Tools Ranked for Quality & Value
Compare the best AI photo colorizers in 2026 — Pixomax Studio, ImageColorizer, DeOldify, Palette.fm, and MyHeritage — ranked by skin tone accuracy, batch processing, and export quality.
- How to Colorize Old Photos with AI: A Complete Guide
Learn how to colorize black and white family photos using AI — from scanning vintage prints to downloading natural, lifelike color results with Pixomax Studio.
Compare tools in our AI photo colorizer comparison table or browse the colorization glossary.